


Throwing
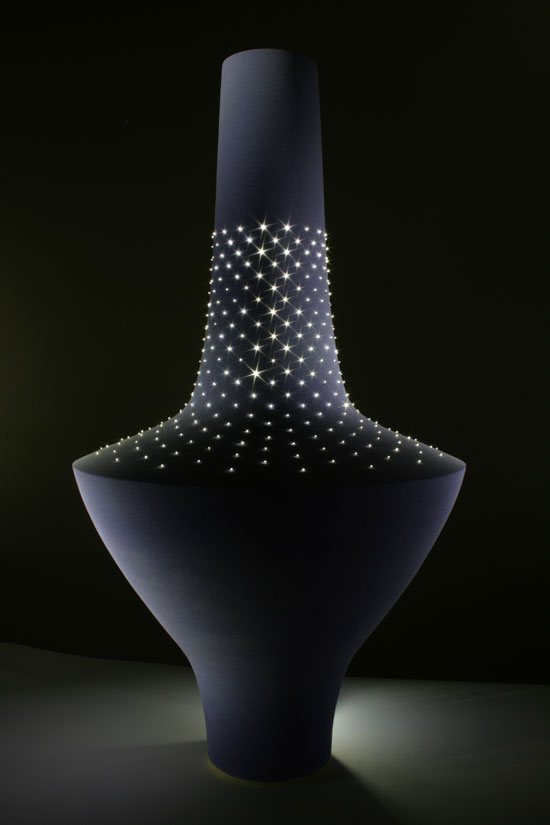
In 2005 I learned techniques for throwing large pieces. Having tried several of these I found a way of working which enabled me to create the pieces illustrated here. For more images of this work see the main page for vol_Luminous.
I began by throwing large forms and then closing the pieces - the first forms I arrived at were torpedo shapes, which could be achieved by continuing to throw then closing the top; a technique I found more difficult than making an inverted top on the wheel then attaching this to the body by scoring and slipping the edges, which is how these pieces were constructed.
I discovered that closed forms trap air, which meant that pressure could be applied to the outside to alter the form while the air pressure inside kept the pieces from collapsing. I decided that these closed forms would make an interesting starting point from which to build a collection and did some rough sketches on paper to explore possible forms.
These acted as a guide only as working on the actual piece involved constant reappraisal to achieve a form that I felt was interesting and well-proportioned while working within the limitations of the material (I did not know at that point if a shape such as that of Terebellum would survive a firing without distorting or slumping as it had a broad circumference supporting a large conical shape - see below)
Throwing a base and allowing it to stiffen before adding coils to construct the walls gave me a firm base on which to build without the piece collapsing. I would roll out coils of JB3, a white stoneware clay, and join them before attaching them to the rim and continuing to throw. The 'tops' I would make separately and attach later. Deneb, for example, consists of three pieces, a base, a platter which forms the shoulder of the piece first thrown then inverted and attached and finally a bowl sunk into the hollow at the top. (Air pressure tried to force the bowl out again so it had to be held in place until the slip had stiffened forming a stronger bond).
Turning
Mekbuda, the tallest piece in the group photograph, was approx 1 metre 10 before firing and in order to throw the top part I wedged a brick on the wheel's pedal to keep it turning and stood on a stool to reach the top. Tall pieces such as this tend to wobble when spinning; I discovered that a 12 inch metal ruler applied pressure evenly over a greater surface area and prevented chattering (where the turning tool jumps over the rotating surface), enabling me to achieve more precise, smooth symmetrical curves than I could with more conventional turning tools.
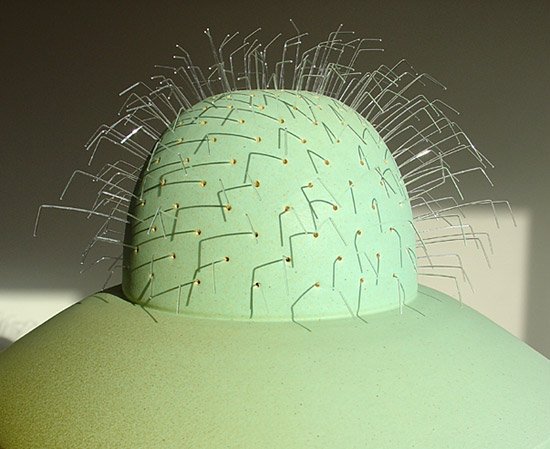
I had made some earlier vessels parts of the surface of which I decorated with small indentations forming patterns of dots, from this idea developed holes then the idea of spines like cacti, which I have grown for many years from seed and whose architectural forms are also a great source of inspiration.
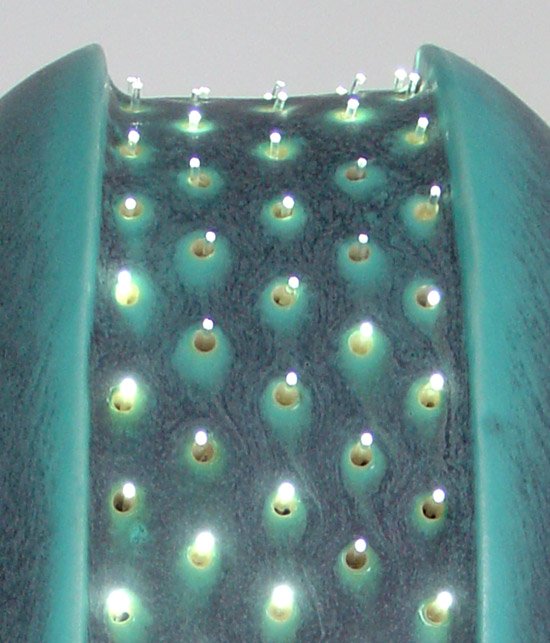
Using a spray booth meant I could get an even coating of glaze using relatively small amounts - approximately 1 litre for the larger pieces. To ensure that the glaze did not fuse over the hole made for the fibre optic cable, I cleaned the glaze out of each hole with an inter-dental brush prior to firing. This caused thinning of the glaze around the edge of each hole giving a marked tonal effect, which is clearly visible in Tarazed where the glaze ’breaks’ (appears lighter) around the holes and on the carved vertical edges.
Fibre optic cables
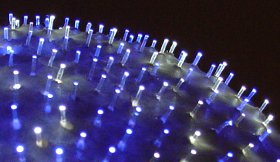
On a trip to India In 1999 I found the illuminated dashboard displays in the taxis of Buddha and other deities moulded in perspex and illuminated with accompanying fibre optic cables very appealing and made a mental note that I would like to work with light in some way. I decided to incorporate fibre optic cables into ceramics. Each fibre is cut to the approximate length required and threaded through the hole and out through the base of the piece. The top end of each cable is bent to prevent it falling through then glued into place before finally being cut almost flush with the surface.
Glazes
Finding many of the available glazes inappropriate for the pieces I was making I embarked on an intensive research programme with the support of Ian Currie’s excellent book: ’Stoneware Glazes - a Systematic Approach’, to develop a range of matt and satin matt glazes more suited to the larger vessels and sculpture I was creating. I found variegated glazes more appealing than uniform ones, particularly as they often exhibit variation across a surface, which can be seen in the magnesium glazes on Syrma and Procyon, both of which use titanium dioxide, which I used extensively to achieve a mottled effect.
I enjoy evolving an idea: exploring the permutations of form and expression of materials in the creation of a body of work which is self-referencing and has an integrity without necessarily having explicit reference to something in the real world. Observers have likened the pieces to marine forms, jellyfish, futuristic cityscapes and exotic forests. I find that the pieces exhibit both an industrial and an organic aesthetic. I find it challenging to attempt to create work that is ’quiet’ yet has a strong presence; a quality I find in the sculptures of Anish Kapoor for example. These notions, together with inspiration from contemporary architecture and industrial design, lead me to create the installation entitled ’vol_Luminous’.
Light Emitting Diodes
Embedded In the wall of each sculpture towards the base is a tiny socket connected to the LED inside, which illuminates the bundle of fibre optic cables. The LEDs require very low voltage: for a single piece a mobile phone charger is plugged into the sculpture; for installations of three or more pieces a single power point is all that is required as a series is run from a single dedicated Philips LED driver. This permits a flexible, modular system in which the pieces can easily be interchanged and relocated. A piece can be plugged in and out of the series; i.e. they are not all ’hard-wired’ together. The LEDS, which illuminate the fibre optic cables, are new generation, high intensity LEDs with a manufacturer’s estimated life of ten years. The LEDs can easily be replaced.
The light emitted by these objects lends to their placement in rooms and hallways where subtle, ambient, night time light is required. Since the pieces sparkle at night I named each piece after a star and now, rather surprisingly, images of the pieces often appear in a Google image search before those of their eponymous giants.
For more images of this work see the main page for vol_Luminous.